How to add the Sartorius NuGet server
The following tutorial provides step-by-step instructions to add the Sartorius NuGet server to your Visual Studio and shows, how to install a Sartorius NuGet package.
Configure NuGet
- Open your Visual Studio.
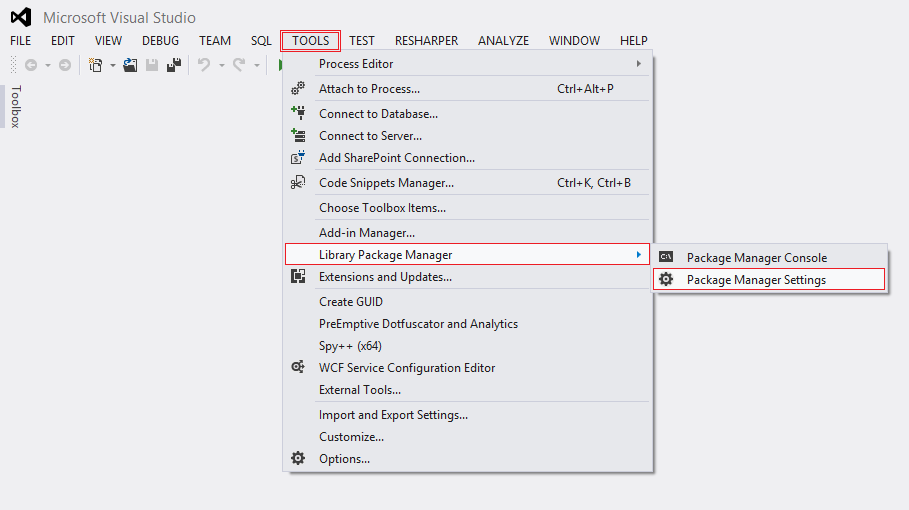
- Choose "Tools" in the main menu stripe.
-
Select "Library Package Manager" and then the sub option "Package Manager Settings".
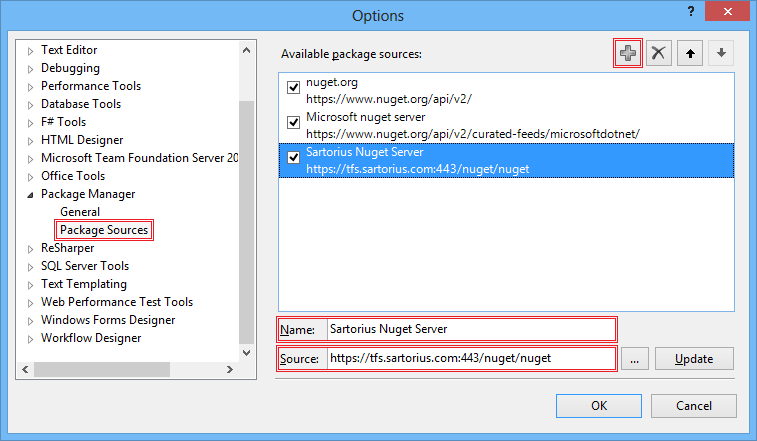
- Add a new package source with the plus button on top.
- Select the new entry and choose the name. This should be something like "Sartorius NuGet Server".
- Add as source the following path: https://tfs.sartorius.com:443/nuget/nuget (use https://tfs.sartorius.com/tfs/SoftwareApplications/_packaging/sartorius/nuget/v3/index.json if you need a nuget v3 source)
-
Confirm the changes and close the dialog with the "OK" button.
Install a NuGet package
- Open a Solution.
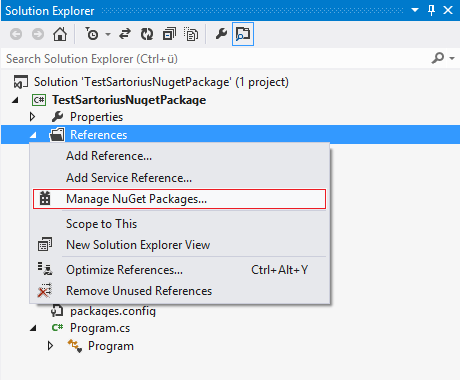
- Go to the Solution Explorer and choose "References".
-
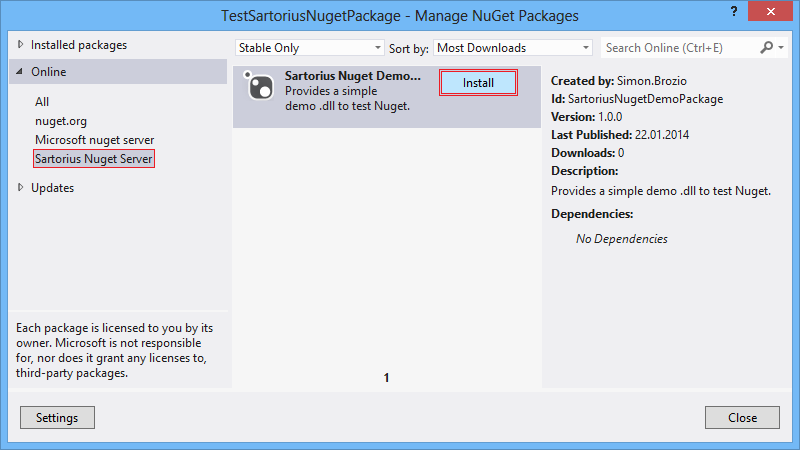
Use the right mouse button and select "Manage NuGet Packages …"
Note
This tutorial was created with Visual Studio 2012. The menus may look different in other versions. If the NuGet Menu asks you for credentials, try to use your normal login credentials. NuGet documentation: http://docs.nuget.org/